hacks to make your PHOTO feel like a MOVIE
Image was shot on Sony A7RIV with Zeiss 55mm f/1.8
There are many reasons why we love the visual of movies. The immersive experience hooks us into the actions. There are many elements involved in the process to create engaging frames. It includes cinematography, editing, visual effect, color grading, etc. Today, I show you a couple of hacks within Adobe Lightroom and Photoshop to make it feel like a still grabbed from your favorite movie. For this tutorial, I will use one of the shots from a birthday party I shot recently to demonstrate.
First, Picking the right shot
An amazing frame starts with an interesting composition and lighting setup. Although the 3D movie is new, the idea of 3 dimensional in a 2D surface was practiced by old cinematographers. I like to have foreground to play with in the scene; in this case, the subject is between her dad and mom, who block all the distracting details around. I often use another hack in the movie industry, which is “backlighting.” Backlighting is a lighting technique used in cinematography where the light source is placed behind the subject, facing toward the camera. This creates a halo or rim of light around the subject, separating them from the background and creating a sense of depth and dimensionality.
Three Thousand Years of Longing Bodies Bodies Bodies King Kong
There are several benefits to using backlighting in cinematography:
Separation: Backlighting can separate the subject from the background, making them stand out more and creating a more three-dimensional look.
Depth: Backlighting can create a sense of depth and dimensionality by adding layers of light and shadow to the image.
Drama: Backlighting can add drama and tension to the scene, especially when used in conjunction with low-key lighting.
Visual interest: Backlighting can create interesting visual effects, such as lens flares or silhouettes, that can add to the overall look and feel of the scene.
Realism: Backlighting can create a more realistic look by simulating natural light sources, such as the sun or other strong light sources.
Next time you watch a movie, pay attention to how many scenes with backlight windows and lampsAlright, let’s dive into the details recovery process
In Lightroom, I try to recover as many details as I can. I think what Lightroom really lacks is a layer function similar to Photoshop. Because color grade on top of an unbalancing image is always bad. I don’t know many professional photographers fully finish their edit in Lightroom alone.Make sure you select the Picture Profile (green box) before doing any adjustment
I like to work with Picture Profile in Lightroom. It’s like choosing a film stock for a film camera. In my case, I choose Camera Light which comes standard with all Sony RAW files. Even though I like this picture profile, Sony raw files certainly tend to be oversaturated. That’s why I decrease the saturation by -18.
Another tool you should look into is HSL Luminance adjustment, this is where you can manipulate individual color channel’s saturation and exposure.
I often use the Color Grading tool as well. Mainly, I use it to balance the color of the image. I went a step ahead by pushing the Shadow toward warm orange since I already knew what look I wanted to go for.
Time to send this to Photoshop, where the magic begins
Let’s analyze the image and understand our objectives in Photoshop
Our image looks flat
If you ever take a painting course, you know what Atmospheric Perspective means. Basically, As objects recede into the distance, they become less distinct, cooler in color, and lighter in value. Using lighter, cooler colors in the background and darker, warmer colors in the foreground can help create a sense of depth.
Grandma has the same brightness as our hero.
Foreground can be darker.
Our hero can be a little bit brighter (but less bright compare to grandma, follow the rule…!)
Now we know what going on with our image, let’s start with adjusting the exposure of each element. Start with the foreground.
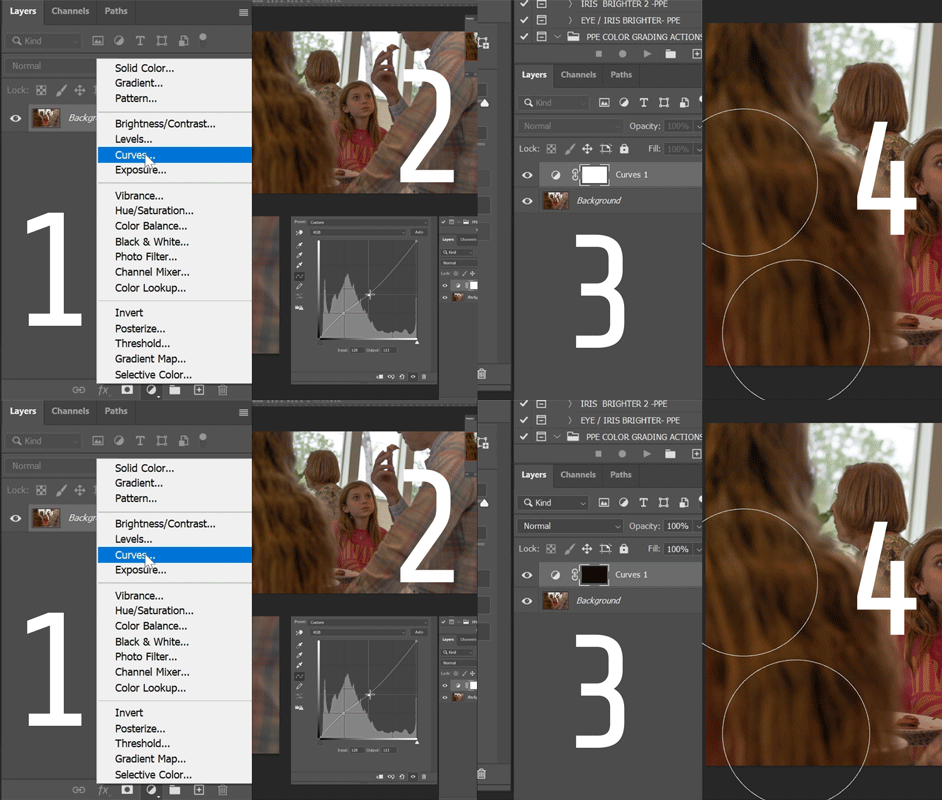
Create a Curves adjustment layer
Reduce brightness
Select the “mask” then press Ctrl + I to invert the mask (Window)
with the White color selected, paint over the area we want to be dark, which is the foreground
Repeat the same steps as above for the mid and background.
Now let’s do the fun part, color grading our image
I want to reference the movie - Wanda (1970). I like the low contrast, especially the teal color in highlight, which works great with white skin and blonde hair.
Teal highlight, peachy skin tone
The secret tool in Photoshop to color grade our image is the Selective Color adjustment layer. Selective Color in Photoshop is a powerful tool that allows you to adjust the individual color channels of an image. It gives you precise control over the colors in your image, allowing you to make selective changes to specific hues, tones, and saturation levels.
We mainly look at White (highlight), Neutral (midtone), and Black (shadow) channels. The midtone in our image is quite red, so I increase the cyan in the Neutral channel. In White channel, I increase the “black” slider, this slider effects its saturation.
Now the image is ready to be sent back to Lightroom for the final touch.
White effects highlight Neutral effects midtone.
The final touch in Lightroom
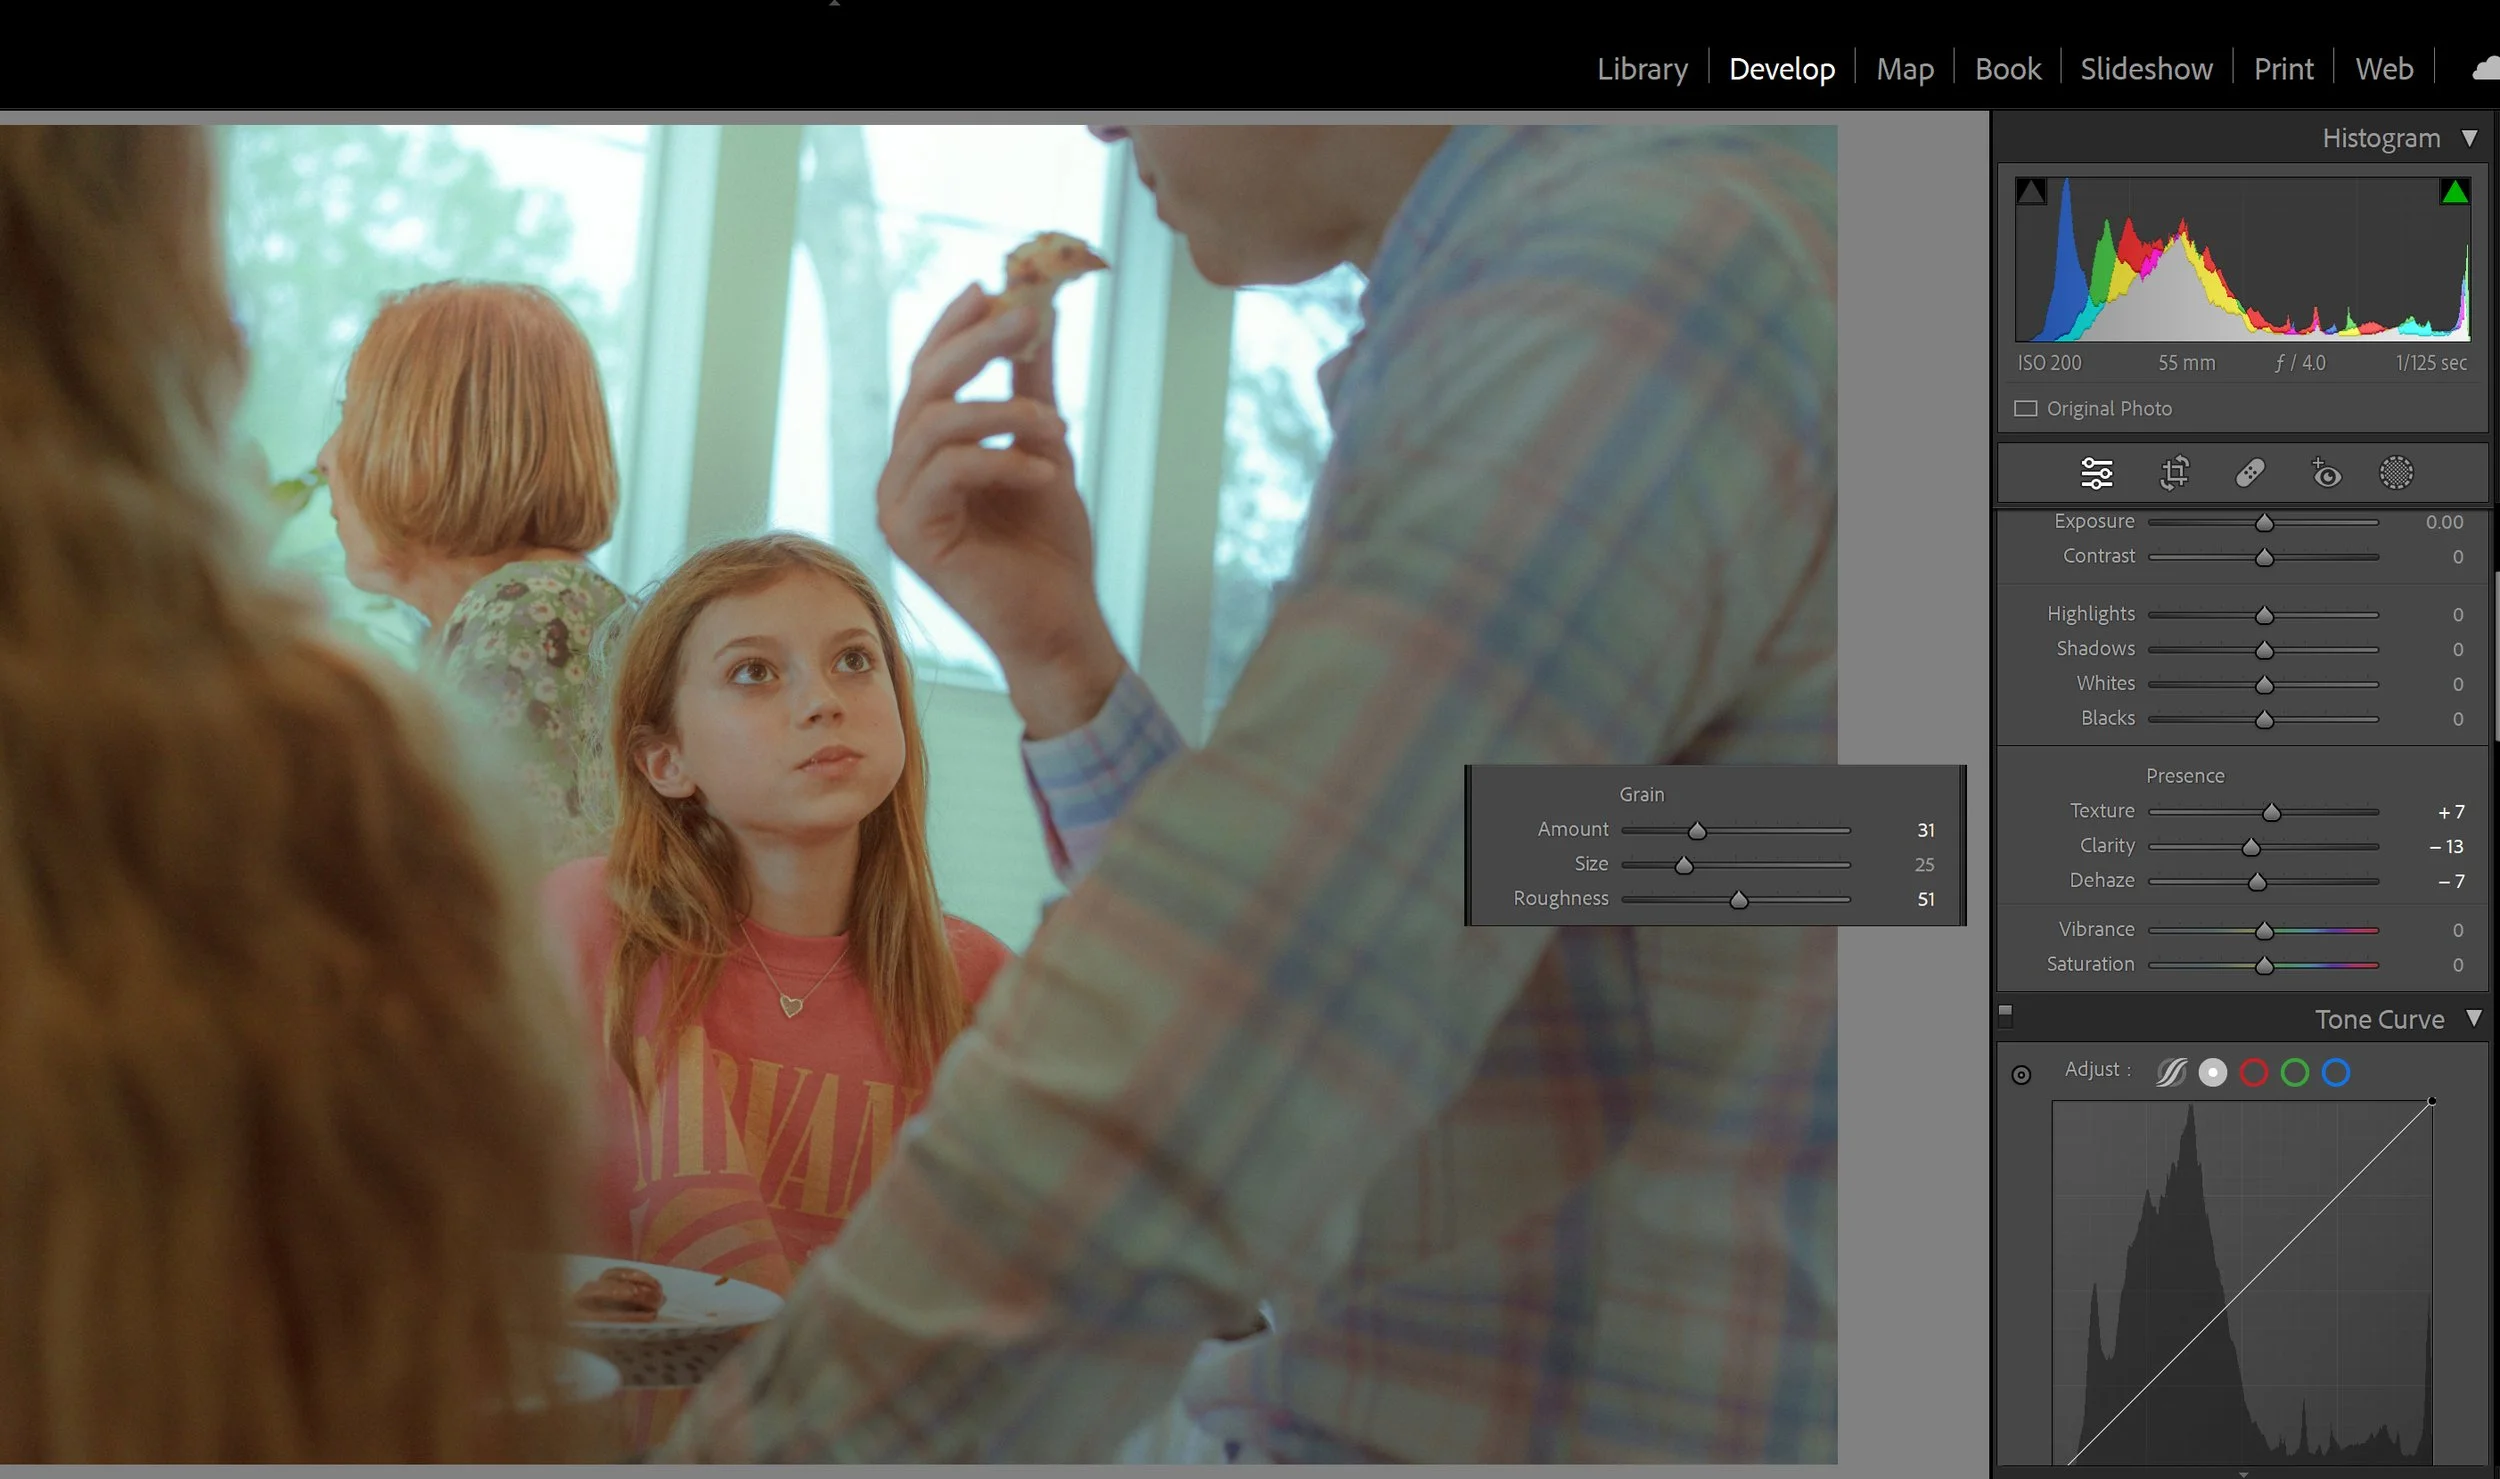
I didn’t use any diffusion filter when I took the shot. And I want to give a soft glow to have a better highlight roll-off, so I decrease clarity and dehaze, increase texture to compensate for soften details. And of course, grain is love, grain is life :)
I hope this tutorial will help you bring more depth into your image, like the movies we always watch. If you have any questions, feel free to comment down below, and I’ll answer to the best of my ability.
Don’t forget to sign up for my newsletter for future updates and tips.


